
Written By Shweta Ganjoo
Published By: Shweta Ganjoo | Published: Jan 11, 2023, 02:13 PM (IST)
![]() Microsoft layoffs will especially hit hardware vertical like Xbox gaming consoles, PC accessories, Surface laptops
Microsoft layoffs will especially hit hardware vertical like Xbox gaming consoles, PC accessories, Surface laptops
Written By Shweta Ganjoo
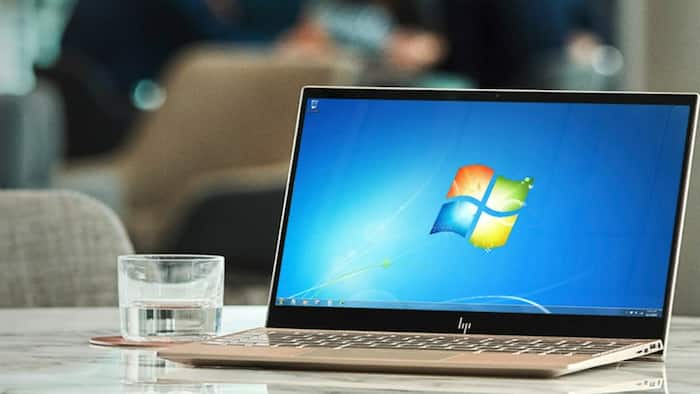
Microsoft has officially ended support for Windows 8.1 and Windows 7 Extended Security Update (ESU) program. This means that the company will no longer be releasing regular software updates and bug fixes for the two operating system. Additionally, it will not be offering any technical support should the users need any if they face an issue while using their PCs. ![]() Also Read: Microsoft’s next Xbox may be closer than expected, AMD hints at launch timeline
Also Read: Microsoft’s next Xbox may be closer than expected, AMD hints at launch timeline
As a remedial measure, Microsoft recommends that all Windows 8.1 and Windows 7 users upgrade their PCs to Windows 11 operating system in a bid to continue getting new features and security updates. “After 10 January 2023, Microsoft will no longer provide security updates or technical support for Windows 8.1. You might be able to upgrade your Windows 8.1 device to a newer version of Windows, but we recommend moving to a new PC that can run Windows 11 as the best option,” Microsoft wrote in a support page. ![]() Also Read: Why Microsoft built Maia 200 custom chip just for AI inference
Also Read: Why Microsoft built Maia 200 custom chip just for AI inference
However, there is a catch. Most PCs that run Windows 7 and Windows 8.1 operating system lack the hardware requirements needed to run Windows 11. For cases like these, the company recommends that the users upgrade to Windows 10 operating system. That said, Microsoft stopped offering free upgrades to Windows 10 on July 29, 2016. This means users will have purchase the full version of Windows 10 Home or Windows 10 Pro operating system, which costs Rs 10,379 and Rs 16,515 in India respectively. ![]() Also Read: Free Apps Worth Installing on Every Phone
Also Read: Free Apps Worth Installing on Every Phone
Step 1: Open the Microsoft Store on your PC and then look for Windows 10 Home or Windows 10 Pro. Alternatively, you can download Windows 10 Home by clicking here and Windows 10 Pro by clicking here.
Step 2: Click on Add to Cart button.
Step 3: Tap the Checkout button.
Step 4: Add your Microsoft account ID and then tap Next.
Step 5: Now, Microsoft will check if your PC meets all the requirements for Windows 10. If it does, it will take you to the screen where you need to complete the purchase.
Step 6: Once you have purchased the selected version of Windows 10, Microsoft will download and install the OS on your PC.
It is worth noting that you may be asked to shut down your PC to complete the installation process.
If you want to upgrade to Windows 11, there are some system requirements that you need to meet. Here’s the list:
— A 64-bits 1GHz processor with two or more cores
— At least 4GB RAM
— At least 64GB storage
— UEFI ans Secure Boot capable system firmware
— TPM version 2.0
— A graphics card compatible with DirectX 12 or later with WDDM 2.0 driver
— An HD display that is bigger than 9-inch with at least 8 bits per colour channel.
You can check a more detailed set of requirements here.
If your PC meets all these requirements, here’s how you can upgrade to Windows 11:
Step 1: Click on the Start menu on your PC.
Step 2: Now, click on the Settings app.
Step 3: Next, click on Update & Security option.
Step 4: Now, click on Windows Update option and the click on Check for Updates option.
Step 5: From here, pick one of these three options:
a. Pick ‘Perform a Full Upgrade’ to keep your personal files (including drivers), apps, and Windows Settings. This is the default experience and is the one that Installation Assistant uses.
b. Pick ‘Keep Data Only’ option to keep personal files (including drivers) only, not apps and not Windows Settings.
c. Lastly, you can pick ‘Clean Install will install Windows 11’ to give your PC a fresh start.
Step 6: Follow the on-screen instructions to complete the process.
Don't Miss Out the Latest Updates. Subscribe to Our Newsletter Today!
