
Written By Deepti Ratnam
Edited By: Deepti Ratnam | Published By: Deepti Ratnam | Published: May 27, 2025, 07:33 PM (IST)

Written By Deepti Ratnam
Do you think that making an explainer video takes too much time, and it’s just way too complicated on your Mac? Then, probably you wish to skip the struggle and just create a polished and effective video fast, or in 2 hours? Well, creating impressive explainer videos in under 2 hours is completely possible with a user-friendly video editor for Mac, Wondershare Filmora.
Let’s show you how simple it can be to create explainer videos without any stress!
So, you want to make your explainer video quickly? You know what the secret is? Well, it’s not the editing, but it’s planning. Doing a little bit of thinking before you start actually saves you a lot of time and helps you hit that under-2-hour goal.
Know What You’re Explaining
What is the most important thing you want your video to tell people? Who are you trying to reach with this video? Knowing your main message and who will watch it helps you make clear decisions about everything else, which makes the rest of the process much faster.
Gather Everything You Need
Get all your important things ready. Any pictures or short clips showing your product or service, or your logo? Keep everything handy. And don’t forget music! The right background music makes a big difference.
A great tip here: Wondershare Filmora, a video editor for Mac, has a huge library of music you can use for free right inside the program.
So, you’ve planned and gathered your bits and pieces. Now, let’s think about the video itself, specifically its length. Usually, people online don’t watch super-long videos. Keeping your explainer short video is key to keeping viewers’ attention nowadays. Somewhere around 60 to 90 seconds of video is enough to get engagement, but try to be as brief and clear as possible.
Write a Quick Script That Works
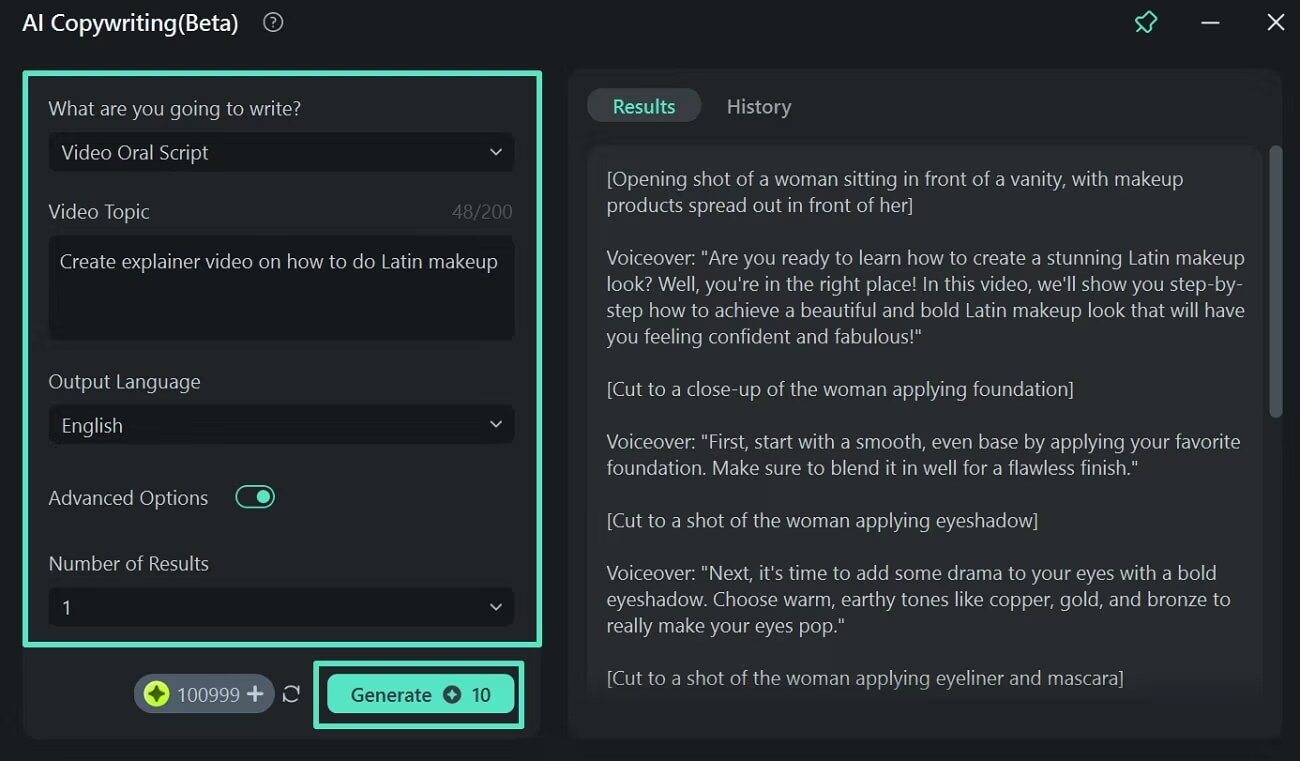
Based on your plan and your target length, just note down what you want to say or show, step-by-step. This simple script keeps you focused. It doesn’t need to be perfect writing. If you’re not sure where to start with your script, Filmora for Mac has a cool AI Copywriting feature that can actually help you brainstorm and write script ideas to get you moving faster.
Now you have your plan, the material is also ready, and your script is ready too. So, it’s time to actually build the video. And this is where Filmora for Mac helps you create explainer videos quickly and efficiently. It’s built to be simple enough for anyone to use but powerful enough to make your video look professional.
Filmora gives you easy tools and some amazing new smart features powered by AI that really speed things up. These are
AI Smart Cutout
Need to remove the background from a person or object in your video or photo instantly, without needing a green screen? Filmora does it in seconds, and it’s perfect for putting things anywhere you want visually.
AI Smart Short Clips
If you have longer video footage, this tool can help you quickly find or create dynamic, short clips from it to keep your video exciting and fast-paced.
AI Lip Sync
If you’re using static images or characters and adding someone speaking, AI Lip Sync can automatically make their mouths move to match the sound. This saves you so much time you’d spend trying to animate it yourself.
AI Text-to-Speech
Don’t have time or prefer not to record your own voiceover? Filmora’s AI can turn your written script into natural-sounding speech in different languages and voices instantly. Just type your script, and Filmora reads it for you.
Simple Steps to Create Your Explainer Video in 2 Hours on Video Editor Mac
Step 1: Set Your Project and Launch Filmora
Ensure you have an idea of what your video is about and its layout before launching the Filmora software on your Mac.
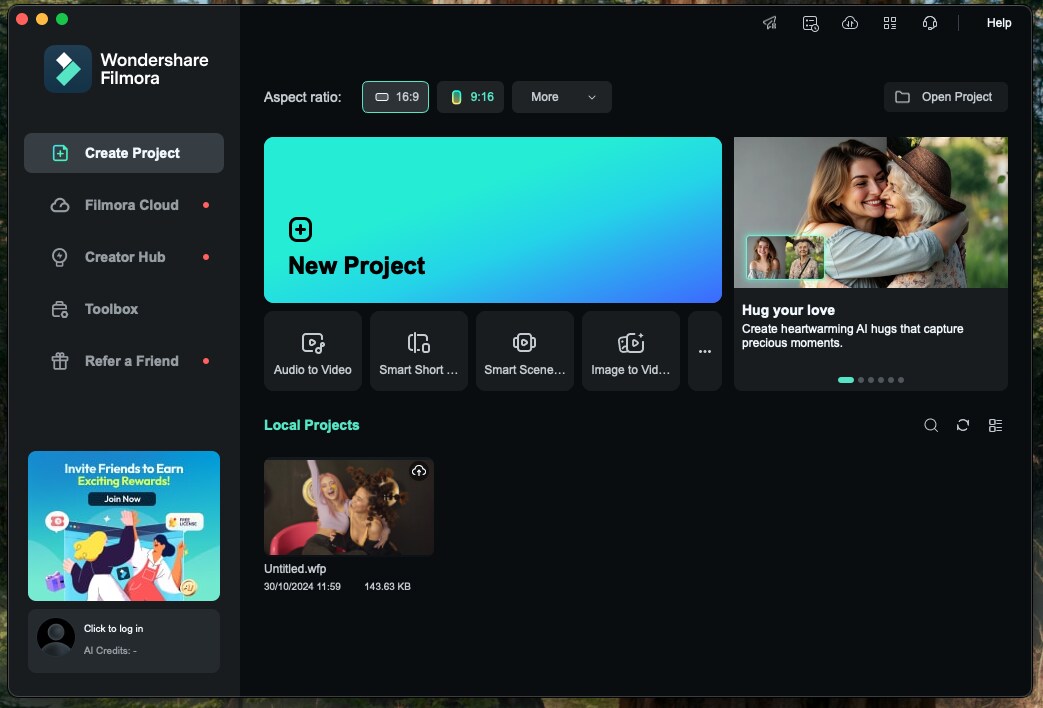
Step 2: Create a New Project
Create your first project hitting, “New Project,” in the main interface of Filmora.
Step 3: Access the Media Section
With your new project opened, access the Media section in the toolbar through Filmora.
Step 4: Record Your Explainer Video
Hit the Record button under the Media section to view the list of options available for recording. Depending on the method of your choice, select it and move on, for example: ‘Record from Webcam.’
Step 5: Set Up Your Recording
A new dialog box appears once you select the recording option. Here, choose your recording settings such as screen resolution, microphone, speakers, as well as the camera you want to use for the recording.
Step 6: Record and Then Stop
Set where to save the recording. Touch the big red round button to start recording. When you are done recording, click the red button once again to stop. It is imported directly into Filmora for editing.
Step 7: Adding Transitions to Your Explainer Video
Put transitions between the various parts of your video to make smooth flow. Access Transitions in the toolbar.
Step 8: Apply Transitions
Search in the library for a transition, and drag it to the timeline wherever you want to add the transition in your explainer video. To find a particular transition, use the search bar and adjust the transitions through the Transitions panel to the right of the screen.
Step 9: Record Voice-Over and Background Music
Audio is an essence of an explainer video. Get into the Audio as the toolbar. To add music, open the AI Music section.
Step 10: Generate AI Music and Apply It
Define your background music mood and theme and hit Generate. When the options are ready, listen to your selections, choose one, and add it to the timeline, making sure that the music matches the visuals of the explainer video.
Step 11: Automatic captioning for better understanding
Make the video more accessible and easy to follow with captions. Head to Titles and open the AI Captions section.
Step 12: Export After Your Final Edits
When your captions are loaded and you have reviewed the entire video with all final edits, you can begin exporting by clicking the Export button, located in the upper-right corner of the Filmora screen.
That’s the easiest way to create an explainer video on Filmora for Mac in under 2 hours and without any hassle.
You are all set with your fabulous explainer video in Filmora! These videos do tend to get a little big to be uploaded online or mailed out sometimes. Thus it comes in very handy to have the built-in video compressor in Filmora. Instead of having to go look outside for other software, it is better to just resize the video file here in Filmora.
It shrinks the video for easy sharing via social networks or emails with a massive size reduction and practically without any loss in quality. Formats supported include, for example, MP4 and MOV, and it also allows you some control in adjusting settings.
Conclusion
All in all, explainer videos that are effective are easy to make on your Mac. With the few steps we have gone over, some planning, a simple script, and Filmora for Mac with its features, one can whip up a very good video within no time. Filmora takes away a lot of stress, from AI tools for fast editing to one-click video compression options for sharing the end product.
Don't Miss Out the Latest Updates. Subscribe to Our Newsletter Today!
